Adding a USD 4.5 Xiaomi temperature sensor to Home Assistant via ZigBee
Flashing custom firmware that adds ZigBee support to this BLE device
Xiaomi sells what they describe as a "Smart Temperature and Humidity Monitor". Essentially it is a tiny plastic box, about 4x4cm, that measures the temperature and displays it on its tiny LCD display.
This is the latest version at the time of writing:

I have not tested the accuracy of the temperature or humidity readings, but my experience so far has been that the readings are broadly in line with my expectations. Xiaomi claims the margin of error is ±0.3℃ for the temperature reading and ±3% for humidity.
Anyway, the devices are pretty cheap. You can get an older version (with essentially the same functionality) off AliExpress for SGD 5.70 (about USD 4.5).
A simple display with the temperature and humidity, whilst nice, isn't terribly exciting though.
Xiaomi says that these devices are 'smart'. What they mean is that the device integrates with Xiaomi's Mi Home ecosystem, and you can pair the device with your phone (or a Mi Home gateway), and read the temperature and humidity data off the Mi Home app.
I am not particularly inclined to get into the closed Mi Home ecosystem or install the Mi Home app. What I wanted to do was to integrate this device with the open source Home Assistant automation system which I already have setup.
Fortunately, this is very much possible.
BLE
Out of the box, the device advertises itself and transmits data via Bluetooth Low Energy (BLE). I was able to add the device via the Gadgetbridge Android app, but could not read the temperature or humidity data. It looks like support for retrieving temperature and humidity data is coming to Gadgetbridge soon, but is not there as yet.
There is a fairly well trodden path for adding the device to Home Assistant via BLE by flashing open source custom firmware to the device that has BTHome support. The latest version at the moment is at github.com/pvvx/ATC_MiThermometer.
Adding the device via BLE to Home Assistant, whilst possible, was not my preferred route because that would mean I would need to set up a Bluetooth Proxy to talk to the device. I already have a decent ZigBee network over ZigBee2MQTT and would prefer to stick to that.
ZigBee
Fortunately, there is open source custom firmware that allows the device to transmit via ZigBee instead of BLE: github.com/devbis/z03mmc. The device is inherently a BLE device, but how the magic happens is by taking advantage of the built-in but unused capabilities of the microcontroller unit (MCU). The MCU is a Telink MCU which supports both BLE and ZigBee. The ZigBee capability seems to be unused by the stock firmware.
Flashing the custom ZigBee firmware is simple and can even be done over-the-air (OTA) from a web browser:
First, visit devbis.github.io/telink-zigbee/, which is an OTA flashing web app developed by the developer of the custom firmware
You'll have to visit in a Chromium browser, as the Web Bluetooth browser APIs used in the web app are currently only available on Chromium browsers
If on Linux, you may need to add yourself to the dialout or tty groups, log out, and log back in, if your browser complains about not being able to access the tty port.1
Next, via the web app, connect to your device by clicking the "Connect button".
If your device is not appearing in the list, you may need to put it into pairing mode. Remove the back cover of the device and connect the Ground and Reset pins via a wire.2 The screen of the device should turn off and back on. I took the following photo when replacing the CR2032 battery:
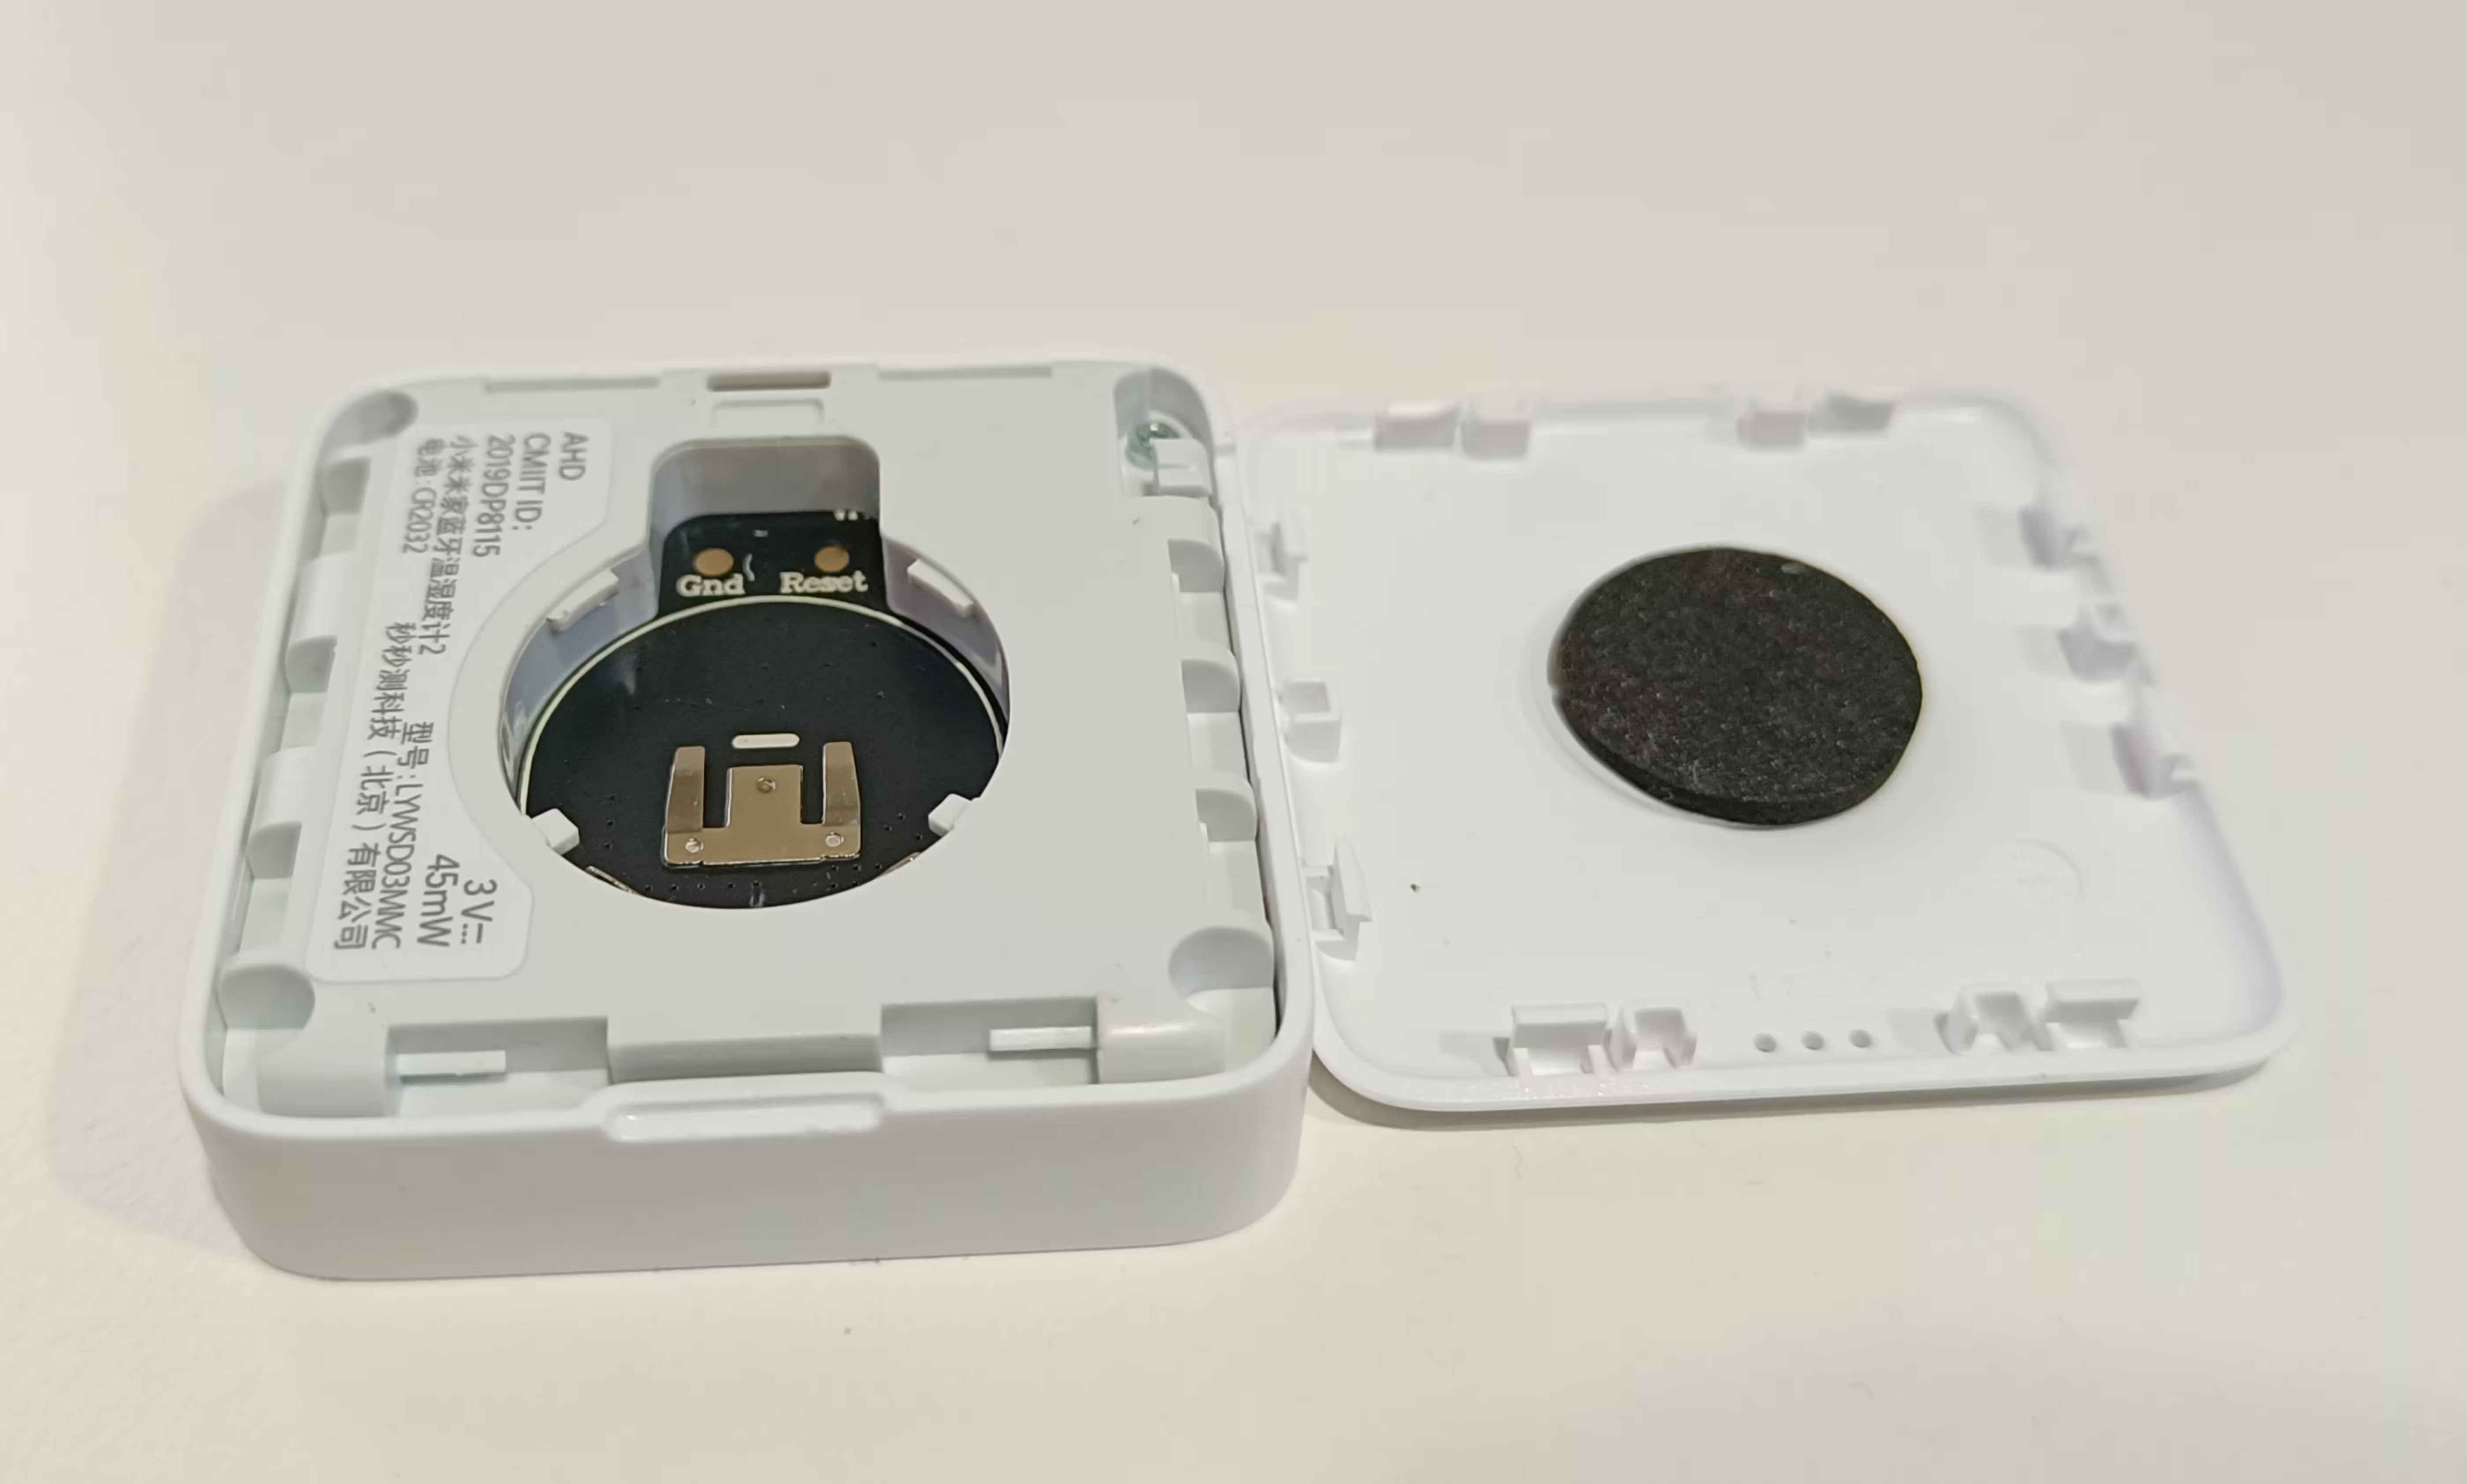
The model number of the device should appear in the list. Mine was "LYWSD03MMC". Proceed to pair.
If you wanted to go down the BLE route mentioned above, you would select "Custom Firmware". For ZigBee support, you should select "Zigbee Firmware", and click "Start Flashing". This will flash the custom ZigBee firmware I linked to earlier.
Once flashing is complete, you can proceed to pair the device with your ZigBee network. In my case, I toggled "enable join" to allow devices to join my ZigBee network then reset the device by connecting the Ground and Reset pins, as before, to put the device in pairing mode.
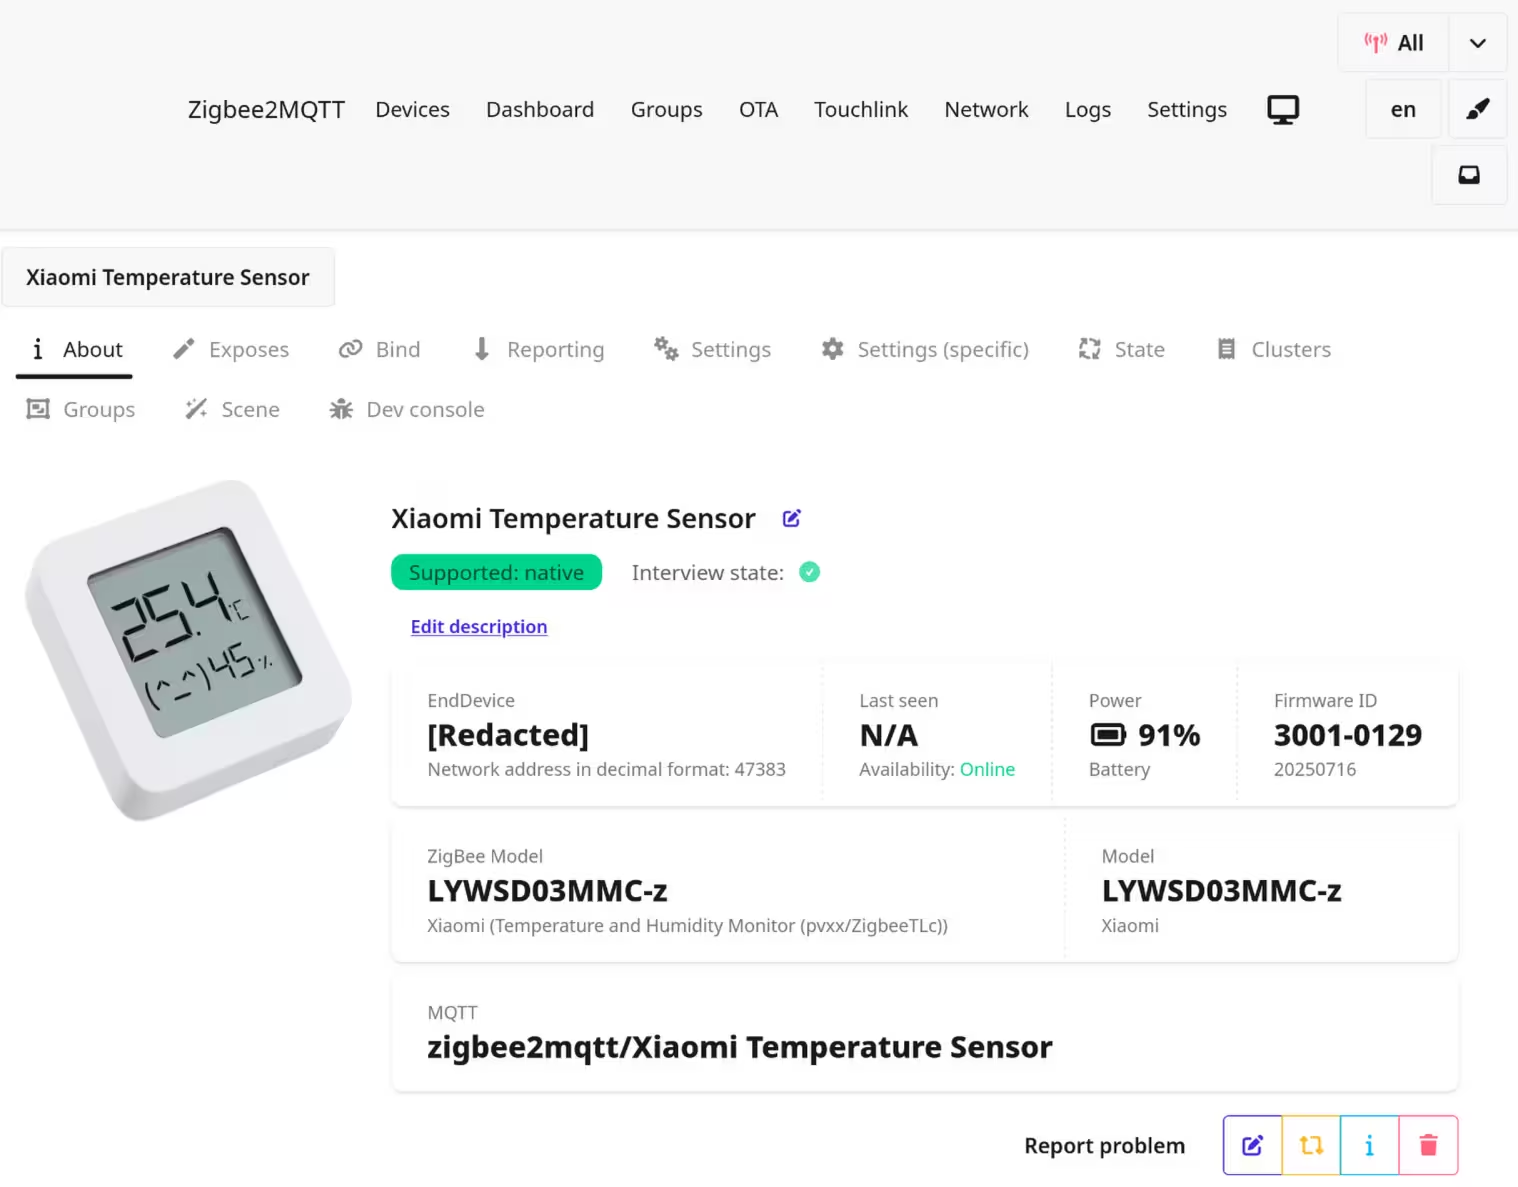
ZigBee2MQTT quickly paired and interviewed the device. It has native support in ZigBee2MQTT:
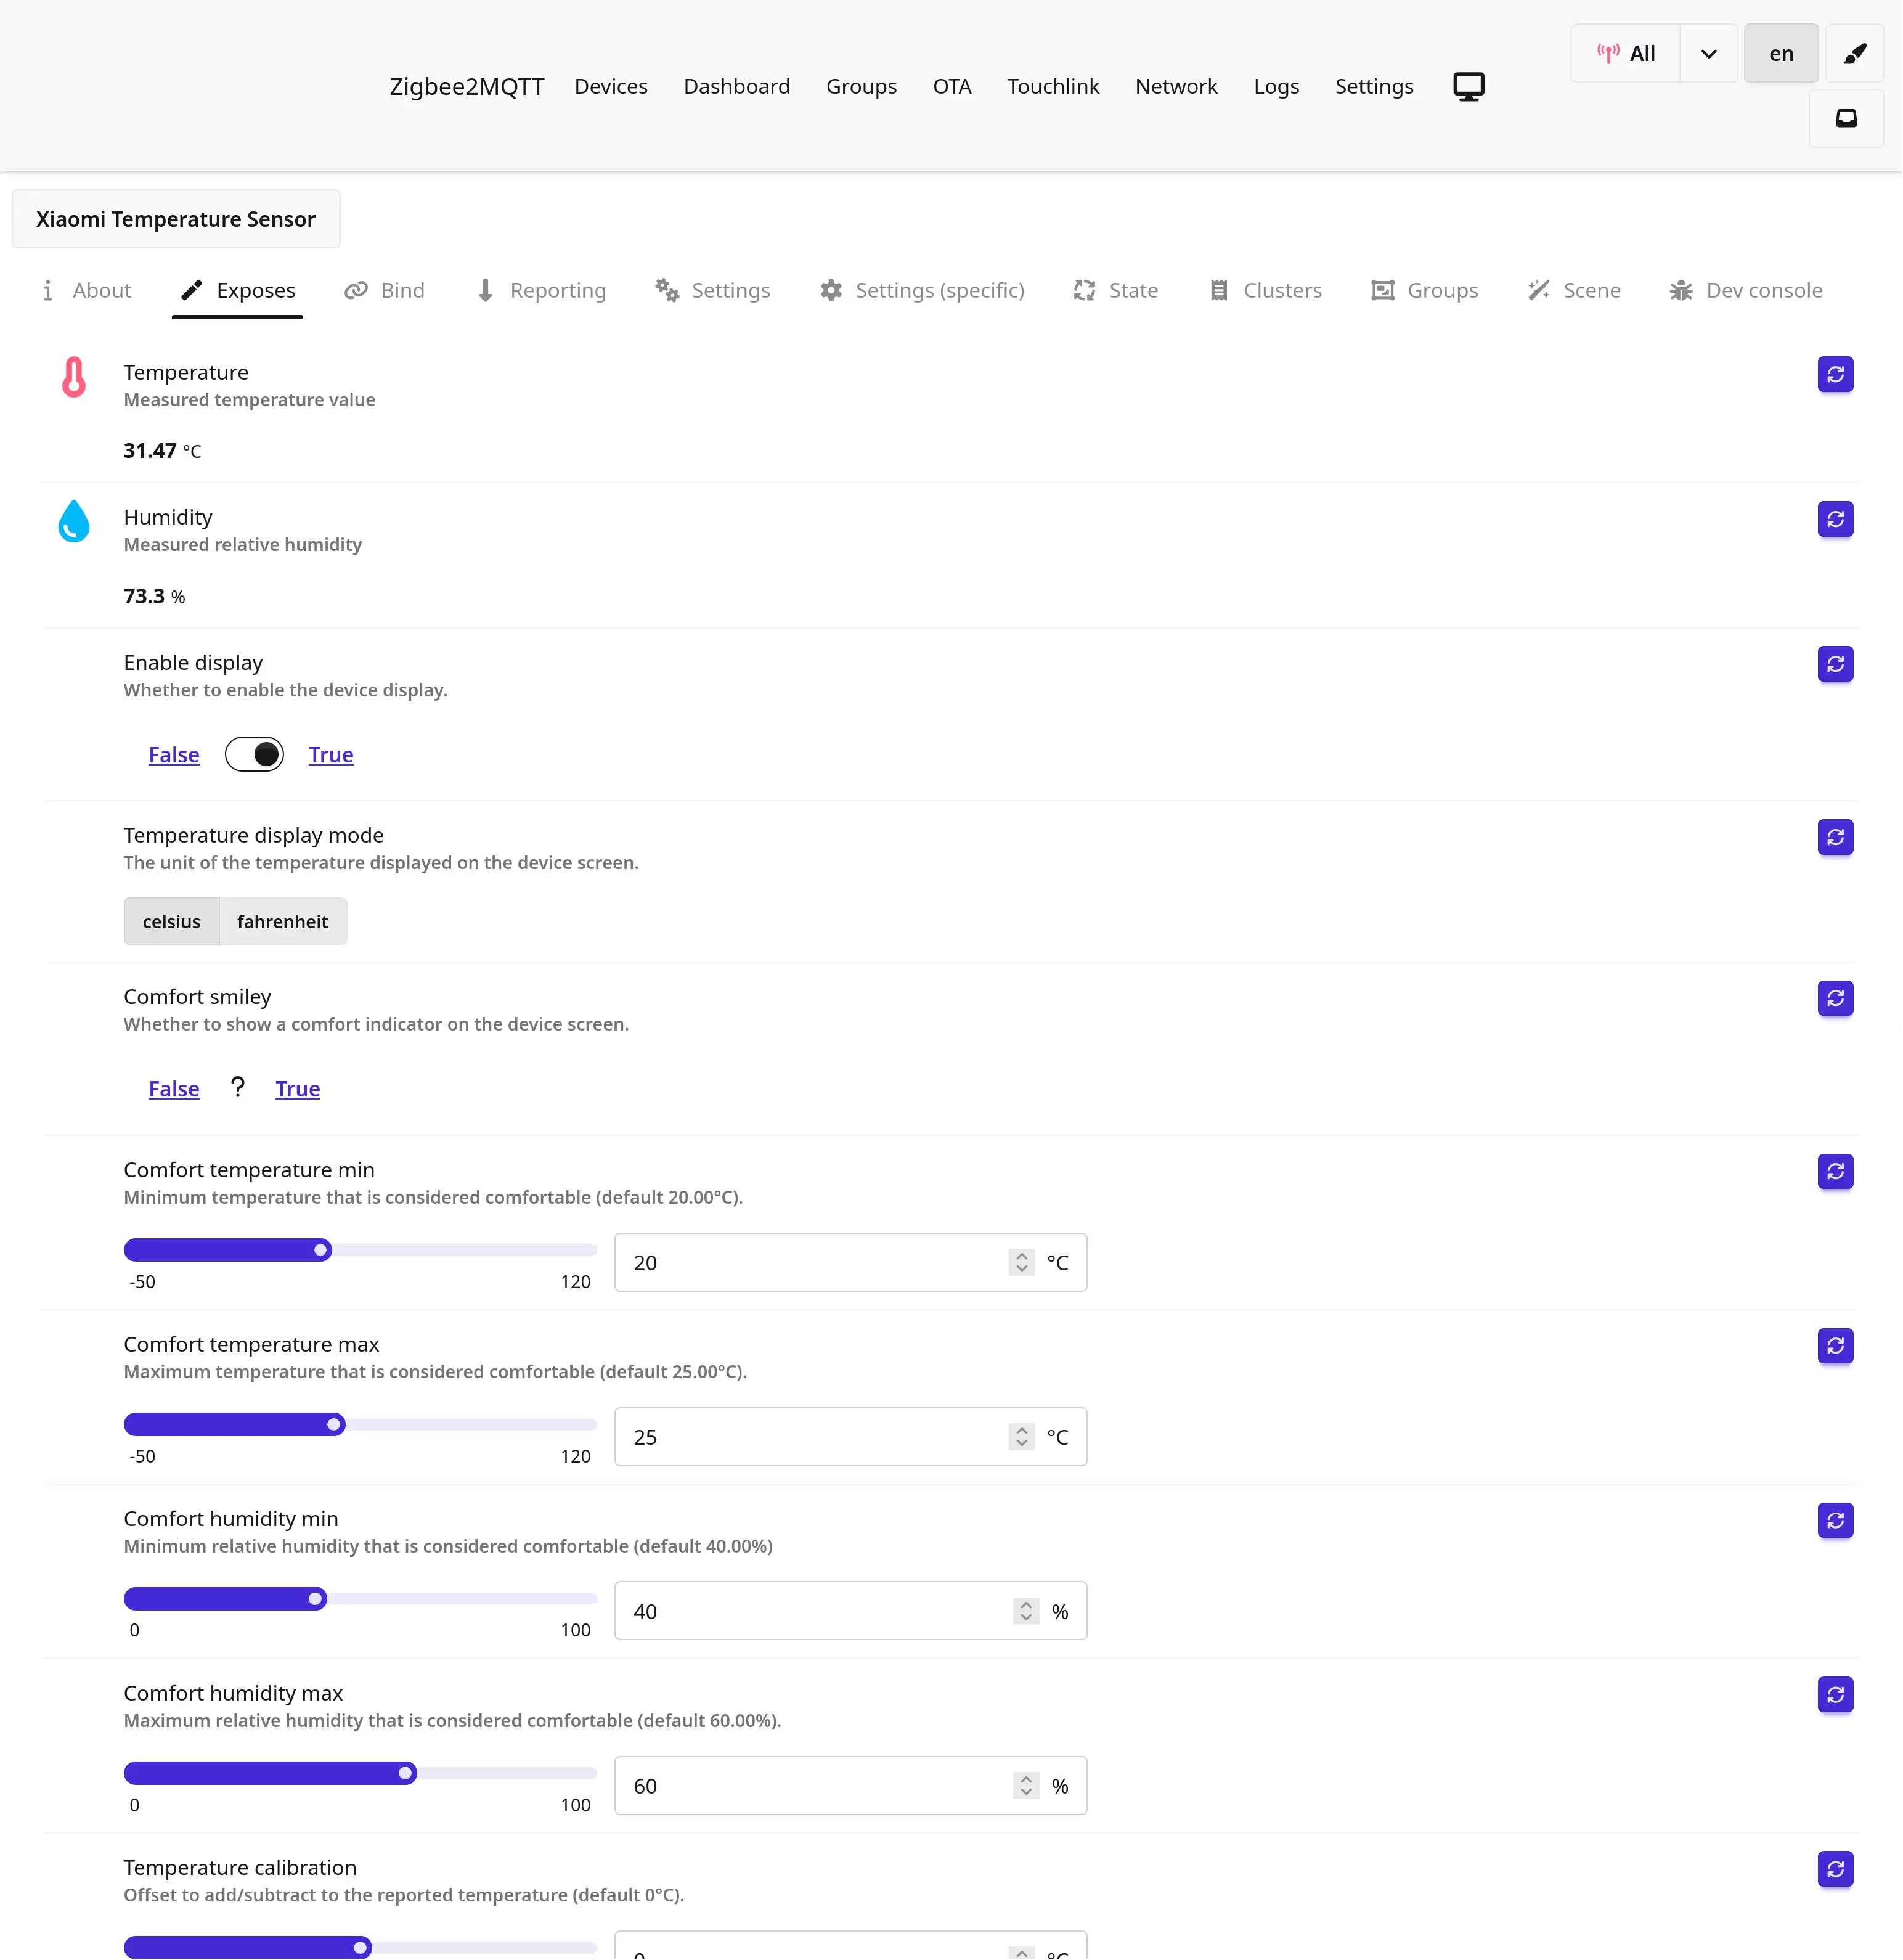
It exposes the temperature and humidity sensors and a whole bunch of options:
- There seems to be an issue with
google-chromeon nixpkgs that prevents the Web Bluetooth APIs from working properly, which is probably to be expected since Web Bluetooth support is experimental on Linux anyway. I was not in the mood to debug this so as a quick fix I just used Google Chrome on Android phone, which worked perfectly well.↩ - A male-to-male breadboard jumper wire should work well. I didn't have one handy though, so I improved with 2 screws I had lying around. It worked.↩